|
Repeat Login Campaign No. 7 Schedule
Friday, January 10, 2014 at 7:00 a.m. (PST)
to Sunday, February 2, 2014 at 6:00 a.m. |
Each day (Earth time) that you log in to FINAL FANTASY XI during the campaign, we will reward you with special points that may be traded in for specific in-game items!
| * |
Login point totals will be calculated separately for each character. |
|
| * |
Points accumulated during this fifth campaign are only usuable therein. |
List of items that can be exchanged for points in Repeat Login Campaign No. 7
 Making its first ever appearance in this campaign, the enigmatic scroll Cipher: Lion is available for 500 points (five logins)!
This item allows its bearer to summon an alter ego of the famous Lion!
Lion may be summoned by completing the Trust initiative initiation quest and trading the cipher to the NPC who gave you the quest.
NPCs offering the initation quest:
- Gondebaud in Southern San d'Oria (L-6)
- Clarion Star in Port Bastok (K-7)
- Wetata in Windurst Woods (G-10)
| * |
Cipher: Lion may not be delivered to different characters on the same account. |

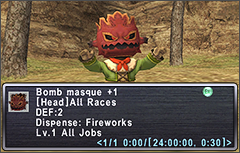 Furthermore, acquiring two Bomb Masques at 1,000 points each (nine logins) for a total of 2,000 points (eleven logins) and synergizing them (required rank: amateur) will yield a Bomb Masque +1!
| * |
Bomb Masques and Bomb Masques +1 may not be delivered to other characters on the same account. |
The following items are also available through the login campaign for the first time ever.
[Bottle of Star Sprinkles]
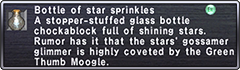 Trading a bottle of star sprinkles to the Green Thumb Moogle in your Mog Garden will reward you with one star sprinkle.
| * |
Bottles of Star Sprinkles may not be delivered to other characters on the same account. |
[Goblin Stew 880]
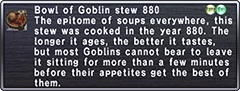 Trading Goblin Stew 880 in lieu of the four items needed for the quest to increase your bag space will enable you to successfully complete the quest.
| * |
Completing the quest requires you to have the necessary fame to start the quest. |
| No. of Points* |
Item |
10
(1) |
- Cavorting Worm
- Little Lugworm
- Athena Orb
- Glinting Shield
- Golden Seed Pouch
- Chestnut Tree Sap
- Monarch Beetle Saliva
- Seasoning Stone
- Fossilized Bone
- Fossilized Fang
- Beastmen's Seal
- Kindred's Seal
|
30
(3) |
- Kindred's Crest
- High Kindred's Crest
- Levigated Rock
- Training Manual
- Sacred Kindred's Crest
|
100
(4) |
- Ecarlate Cloth
- Utopian Gold Thread
- Benedict Silk
- Diabolic Silk
- Ruby Silk Thread
- Supple Skin
- Snowy Sermet
- Dark Orichalcum
- Smalt Leather
- Coiled Yarn
- Chameleon Yarn
- Scarlet Odoshi
- Plaited Cord
- Cobalt Mithril Sheet
- Glittering Yarn
- Luminian Thread
- Silkworm Thread
- Pantin Wire
- Filet Lace
- Brilliantine
|
200
(5) |
- Vision Stone
- Vision Coin
- Vision Jewel
- Vision Card
- Ardor Stone
- Ardor Coin
- Ardor Jewel
- Ardor Card
- Wieldance Stone
- Wieldance Coin
- Wieldance Jewel
- Wieldance Card
- Balance Stone
- Balance Coin
- Balance Jewel
- Balance Card
- Voyage Stone
- Voyage Coin
- Voyage Jewel
- Voyage Card
|
|
|
| No. of Points* |
Item |
300
(5) |
- Redeyes
- Copse Candy
- Ark Angel HM Statue
- Ark Angel TT Statue
- Ark Angel MR Statue
- Ark Angel EV Statue
- Ark Angel GK Statue
- Rala Visage I
- Cirdas Visage I
- Yorcia Visage I
- Faithful's Torso I
- Faithful's Legs I
- Miratete's Memoirs
- Star Sprinkles
- Mannequin Head
- Mannequin Body
- Mannequin Hands
- Mannequin Legs
- Mannequin Feet
|
500
(5) |
- Chocobo Wand
- Nomad Moogle rod
- Kupon I-Orche
- Odin Statue
- Ark Tachi
- Ark Saber
- Ark Scythe
- Airlixir +1
- Cipher: Lion
- Frayed Pouch (B)
- Frayed Pouch (A)
- Frayed Pouch (G)
- Frayed Pouch (D)
- Frayed Pouch (R)
|
1,000
(9) |
- Honey Wine
- Beastly Shank
- Blue Pondweed
- Rolanberry Delightaru
- Rala Visage III
- Cirdas Visage III
- Yorcia Visage III
- Faithful's Torso III
- Faithful's Legs III
- Verdigris Stone +1
- Goblin Stew 880
- Bomb Masque
- Frayed Sack (D)
|
2,000
(11) |
- Vial of black beetle blood
- Phoenix feather
- Square of damascene cloth
- Spool of malboro fiber
- Piece of oxblood
- Frayed Sack (L)
|
|
| * |
The numbers in parentheses represent the number of logins (starting with the initial login) needed to purchase the item. |
|
How to Obtain Login Points
You will automatically accumulate points once per day when you first log in.
| * |
If you receive login points for a particular day and remain logged in until the next reset (8:00 a.m. (PDT)), you will not automatically receive login points for that next reset. You must log out first and then log back in to receive those points. |
|
| * |
Login point totals will be calculated separately for each character. |
Number of Obtainable Points
The amount of points you receive during this campaign varies depending on the number of logins. At certain breakpoints you will receive a bonus.
First to Fourth Logins
The first login will provide you with ten points, with the number increasing in increments of ten for the second login and beyond.
Sixth login and beyond
Each login will provide you with one hundred points.
Bonus points
You will receive a bonus of five hundred points for each login that is a multiple of five (five, ten, fifteen...). As a special bonus, players reaching their eleventh login will receive 1,100 points.
|
|
| Login No. |
Points |
| 1 |
10 |
| 2 |
20 |
| 3 |
30 |
| 4 |
40 |
| 5 |
500 |
| 6 |
100 |
| 7 |
100 |
| 8 |
100 |
| 9 |
100 |
| 10 |
500 |
| 11 |
1,100 |
12
 |
100
|
|
Exchanging Login Points
Speak with the Greeter Moogle located in one of the following areas in order to check how many points you have, as well as to exchange points for items.
Port San d’Oria (J-10) / Port Bastok (J-13) / Windurst Walls (C-13) / Chocobo Circuit (H-8)
* The Greeter Moogles at each of these locations all provide the same services.
Login Campaign Point Exchange Period
In-game items for this login campaign must be purchased within the following time frame:
| Repeat Login Campain No.7 Point Exchange Period |
Friday, January 10, 2014 at 7:00 a.m. (PST)
to Sunday, February 9, 2014 at 6:00 a.m. |
| * |
Your points will be lost if they are not exchanged within this time frame. |
|
| * |
Players will be unable to receive login points once the campaign has concluded on Sunday, February 2, 2014 at 6:00 a.m. (PST) |
|
| * |
Points acquired during this period are only valid for Repeat Login Campaign No. 7. |
You may exchange points for equipment given by the various kupons by speaking with the Dealer Moogle at the following locations:
Port San d'Oria (I-9) / Port Bastok (L-8) / Port Windurst (F-6) / Chocobo Circuit (H-9)
Kupon I-Orche
Kupon I-Orche is an item that can be traded for either one of the following two key items: Sheet of Eastern Adoulinian Tunes or Sheet of Western Adoulinian Tunes.
| * |
Note that selecting either of these two sheets of music for your orchestrion requires installation and registration of the Seekers of Adoulin expansion pack. |
Athena Orb
An Athena Orb is required for entering the special Heroine’s Holdfast battlefield. Refer to this post for more information.
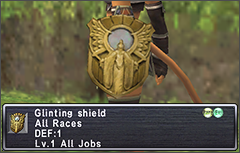 Glinting Shield
The glinting shield is a replica of the shield that won the shield design contest.
Glinting Shield
The glinting shield is a replica of the shield that won the shield design contest.
 Pinches of Levigated Rock
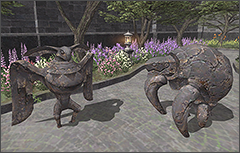
This item can transform you into stone statues appearing in Dynamis!
Pinches of Levigated Rock
This item can transform you into stone statues appearing in Dynamis!
 Training Manual
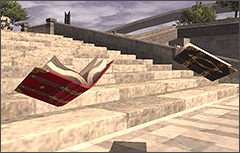
This item can transform you into any of a number of such books found throughout Vana'diel
Training Manual
This item can transform you into any of a number of such books found throughout Vana'diel
 Cavorting Worm
The cavorting worm is an item that lets the bearer take the form of a Meeble.
Cavorting Worm
The cavorting worm is an item that lets the bearer take the form of a Meeble.
 Little Lugworm
The little lugworm is an item that lets the bearer take the form of a toad.
Golden Seed Pouch / Chestnut Tree Sap / Monarch Beetle Saliva
Little Lugworm
The little lugworm is an item that lets the bearer take the form of a toad.
Golden Seed Pouch / Chestnut Tree Sap / Monarch Beetle Saliva
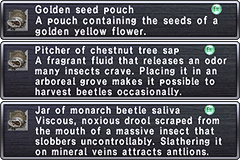 The following items may be used as seeds/fertilizer in your Mog Garden, and have some strange relation to Monstrosity content:
| * |
This campaign is not the only way by which players can acquire these items. |
|
|
|


